Saturday, July 16, 2016

Cascade Pass/Sahale Arm (Sahale Glacier Camp) - N. Cascades, WA


July 14, 2016

Welcome to a JURASSIC WORLD! Seriously, that was my reaction when I drove into the parking lot and the breathtaking landscape and scenery appeared before me....totally "jaw-dropping"! I had read and heard Cascade Pass hike is one of the top rated and must do hikes of N. Cascades, and now I believe it....I was totally blown away! With the trail moderately graded to reach the pass (3.7 miles/1,800' gain), this hike offers the whole nine yards....spectacular views of peaks and glaciers, waterfalls, lakes, wildflowers, wildlife and options for backcountry hikes and camping along with frontier history. I saw many different kinds of wildlife in this hike....marmots, pikas, chipmunks, deer, mountain goat and wild birds. If you pick one hike to do in N. Cascades, this is it! Beyond description. Period.

Road condition
From SR 20 at Marblemount, drive Cascade River Road for 23 miles to trailhead. The road is in good condition. You can see some major restoration works were done after a series of washout. The first half of the road is paved and the second half is dirt/gravel/washboard. The road gets narrow and has potholes for the last 6 miles, so pay attention as you go. Trailhead has a large parking lot with restroom.

Trail condition
Trail is in great shape in spite of heavy use. It has some wet and muddy spots here and there, but no major issue. However, if you hike in sneakers, chances are your feet may get wet. There are a couple of snow fields to cross near Cascade Pass. One of them is about 100' long on the steep gully. You can follow the boot tracks, but the snow could get slushy and slippery. I found my hiking poles helpful to balance. On the way to Doubtful Lake/Sahale Glacier Camp, there are a few snow fields (10' - 20' long) to traverse and some of them are forming a snow bridge with water running underneath. So, use caution when you cross. Trail/snow condition included in the short video below.

Cascade Pass
Trailhead's large parking lot fills up fast as this is a very popular destination for hiking, camping and backpacking. Even it was Thursday, the lot was pretty full when I arrived after 12/noon....and I saw more cars arriving. The trail ascends gently for the first 1/2 mile and then moderately steep grade begins to climb steadily with switchbacks through the forest. I liked the sound of waterfalls and streams keeping a good company all along. After 2 miles in, the views open up as the treeline thins out. Now you are looking at the same breathtaking vista from a higher vantage point. Stunning! At 3 miles, the trail levels out through meadows. Wildflowers are blooming! And the views of the jagged mountains get even better as you go. After the meadows, the trail comes along the hillside (scree) partially covered with snow. The snow field to cross is about 100' long and you can follow boot tracks. It may get slushy/slippery, so just use caution.

Take in the grand vistas from Cascade Pass. The pass is a gateway to connect different paths traveling in all directions. Frontier traders used to use the pass in the past, and today hikers and backpackers (....and wildlife, too!). Views to north and west are the ragged Cascade range as you see along the hike. Facing southeast is looking towards Stehekin over 30 miles away from the pass which is a remote community only accessible on foot, by ferry or seaplane. In fact, I was in Stehekin 2 weeks ago and had a great hike there. Looking east, you can see a trail going up towards Sahale Arm.

Sahale Arm (Sahale Glacier Camp)
You have a few options for hiking from the pass. You can turn around and head back to the parking lot, or you can venture towards Stehekin, or continue another 2 miles/2,100' gain to reach Sahale Glacier Camp. My goal was to hike up to Sahale Glacier, so I took that route from the pass.

From the pass, follow the trail sign which says Stehekin. Soon you come to another sign/intersecion which says Sahale Arm/Stehekin. Go left/Sahale Arm at the post. The trail to Sahale Arm gets steep and rocky once you leave Cascade Pass. Some snow fields are en route, but not hard to cross. Just use caution to traverse the snow field forming a snow bridge. There are wet and muddy spots along the trail, but no biggie.....keep "minimum impact" in mind, however, if you have to veer around. As the trail climbs steadily with switchbacks, the views get better and better....WOW! You can see Cascade Pass down below with the great wall of all the jagged mountain peaks facing you.

Trekking up the hillside for one mile from the pass, you come to the trail sign of Doubtful Lake. I took a quick look at the lake from above, and continued on the journey towards Sahale Arm. The trail leads you on to the saddle stretching up to Sahale. It's beautiful green meadows with wildflowers.....and also it's a haven for marmots! There are so many marmots on the meadows. I lost counts how many marmots I saw! They surprised me as I surprised them!? After passing the meadows, the trail gets steeper and the scree rockier for the last 1/2 or so. At one point, the trail disappears and gets a little sketchy due to scree/loose rocks covering over trail, but there are cairns to guide you to stay on track.

Enjoy the views from Sahale Glacier Camp! Splendid! Another WOW moment (how many wows so far?) At 7,600 elevation, you have sweeping vistas of N. Cascades range and beyond as far as you can see....and Sahale Arm looms over you across the glacier. Johannesburg Mountain, Cascade Peak, Magic Mountain, Trapper Mountain, Glory Mountain, Eldorado Peak, Forbidden Peak, Mount Formidable, Spider Mountain, LeConte Mountain.....these are the names of the peaks I just learned with this hike. McGregor Mountain near Stehekin was also seen in the southern skyline. And, guess who came to greet me out of the blue? Wow, mountain goat! Five of them....they looked like a family(?) because I noticed a baby goat with them.

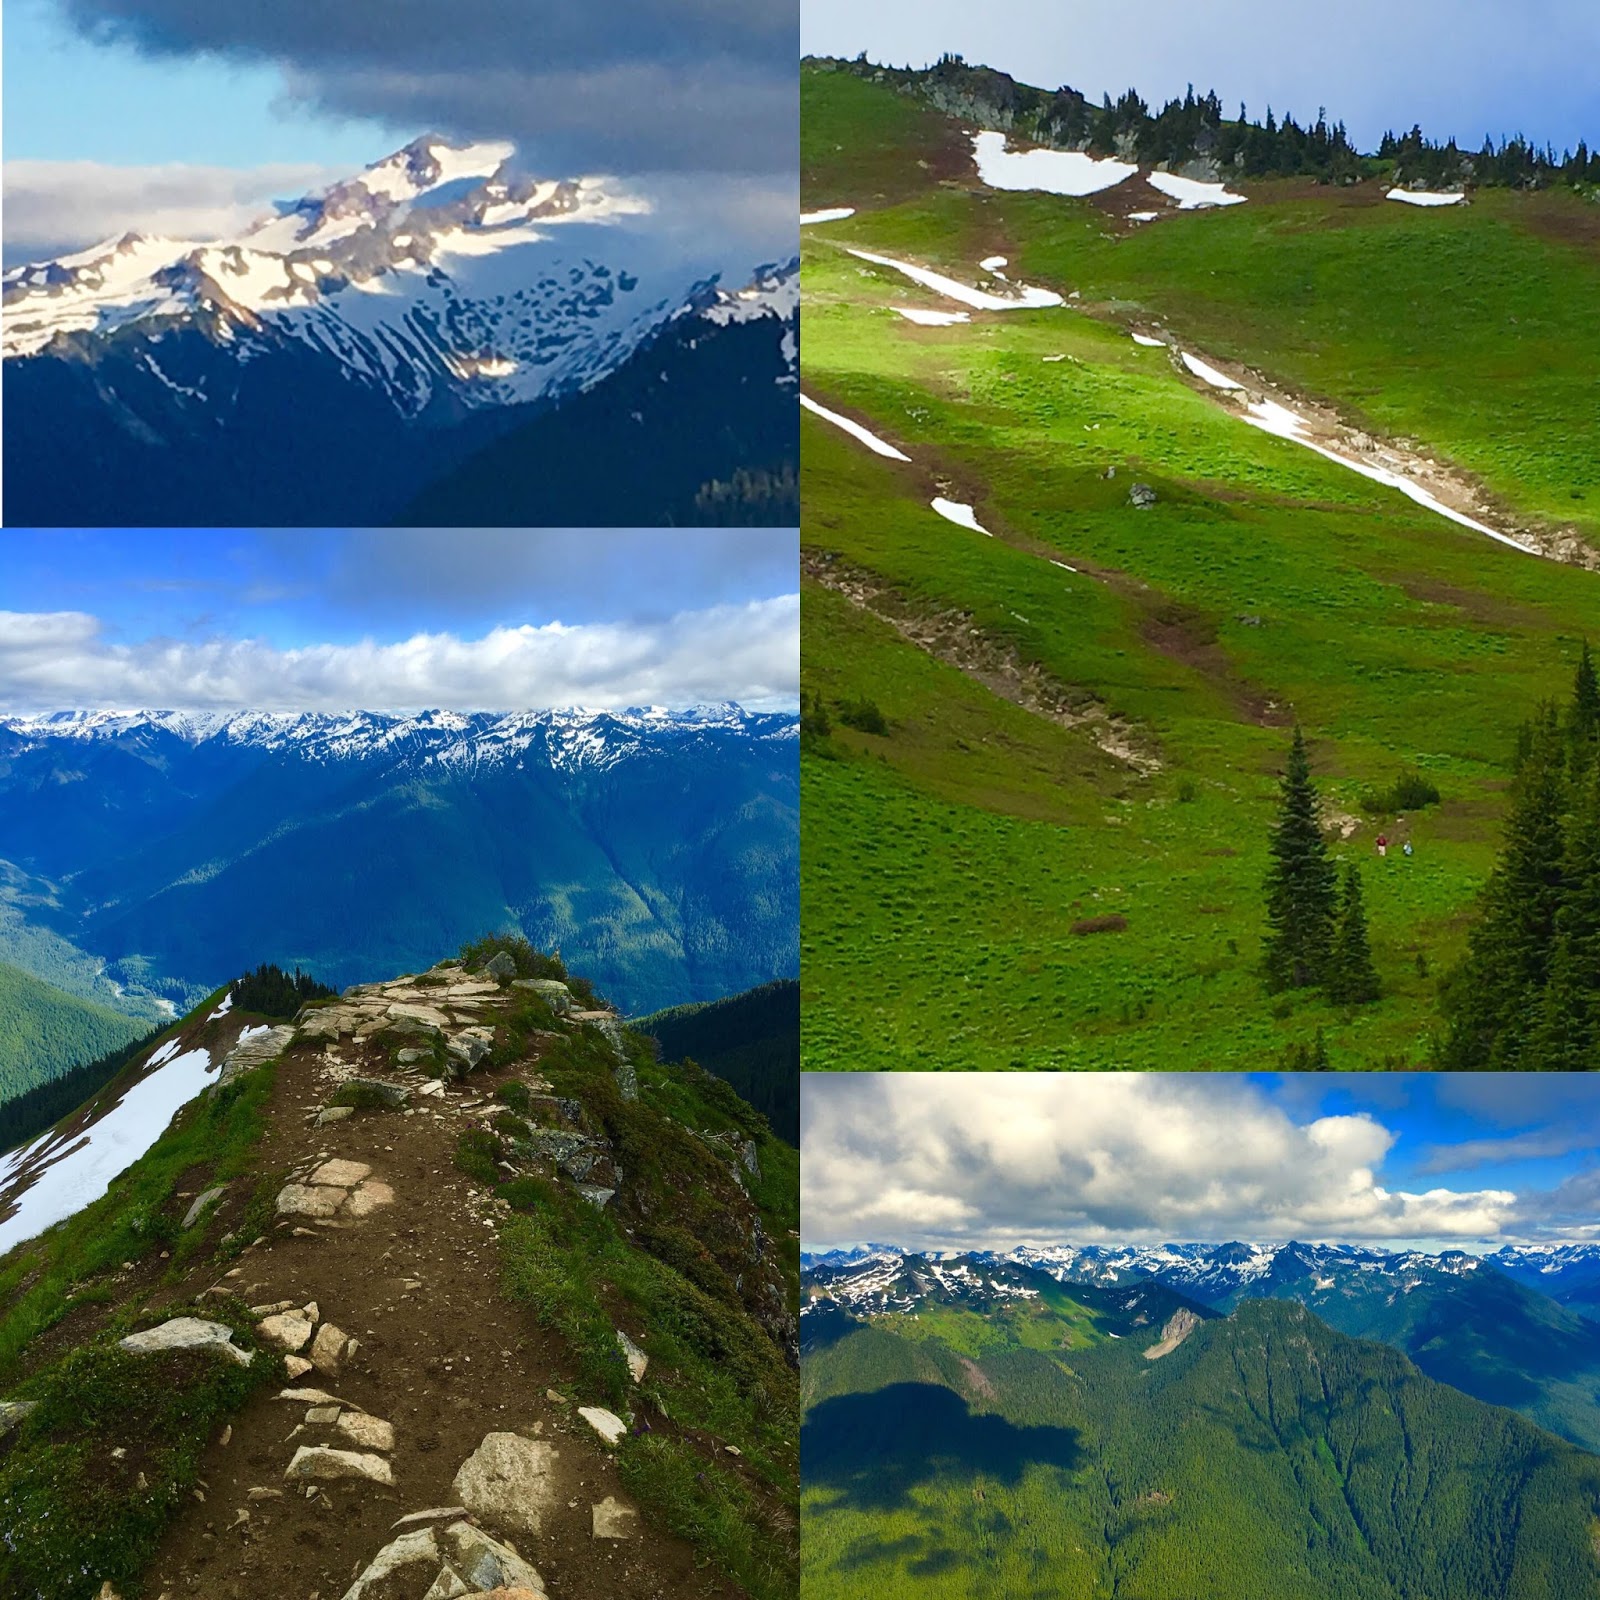
There are many beautiful hikes in N. Cascades. If I were asked to pick one best hike among of all, Cascade Pass/Sahale Arm would be the one no doubt. Put this hike on your hiking list if you haven't hiked it yet. You'll be blown away! I highly recommend this hike with lots of WOWs. Happy hiking! :)


Saturday, July 9, 2016

Green Mountain - N. Cascades, WA


Wildflowers galore! All sorts of wildflowers are blooming along the green meadows in this hike and I've never seen so many tiger lilies all over. And, yes, indeed, Green Mountain is so GREEN!! The name of the mountain speaks for itself.

What a beautiful hike! Is Green Mountain sort of like a hidden gem? I am not sure how popular or well known this hike is, but it is GORGEOUS!....from wildflowers/creeks/tarns/meadows to sweeping mountain views of N. Cascades/Glacier Peak/Mt. Baker ranges in all directions including as far as the Puget Sound. I am so glad I found this hike thanks to WTA's trip description and recent trip reports. The lookout, built in 1933, still exists on top of Green Mountain. It's listed on the National Register of Historic Places and restoration is ongoing. When you see jaw-dropping 360 panorama from the summit and understand the terrains of the groups of the surrounding peaks, ranges and geography, it makes sense why the lookout was built on top of Green Mountain.

Road condition
FR 26 (Suiattle River Road) is in great condition. From SR 530, follow FR 26 about 20 miles to FR 2680. The first half of FR 26 is paved and the second half is dirt/gravel (it looks and feels like paved, however). From FR 26, drive FR 2680 about 6 miles to trailhead. FR 2680 is a narrow and rough road (bumpy and rocky), but not too bad. My 4 door sedan could handle it with no problem. Just go slow and take it easy. Road condition included in the short video clip below.

Green Mountain Trail
The trail climbs gently through the old growth of the timberline for the first 1/2 mile or so, and then gets moderately steep until the view opens up at 1 mile and you come into green meadows on the slope of the mountain. Wow, it's so GREEN!....it's like a thick green velvet covering the mountain. The meadows are alive with so many wildflowers you can imagine along the trail. They are also quite entertaining with different varieties, colors and smells....never monotonous! Particularly, I really enjoyed tiger lilies because I've never seen that many tiger lilies bursting all over. By the way, part of the trail through the meadows gets brushy with waist high vegetation, so wearing long pants may be recommended if you are one of those who don't like to be brushed by plants.

After ascending the green meadows filled with wildflowers, at 2.5 miles you descend to a little valley and the trail passes a tarn and crosses a creek. There is a big blowdown blocking the trail soon after the tarn, but you can cross over it by veering to right or left. After that, you come to vast open meadows surrounded by green mountains...wow! From there you can see Green Mountain's summit and spot the lookout standing on the top. In the meadows I noticed glacier lilies were just about to bloom soon.....budding.

The last mile to the top is quite steep with switchbacks. There are some snow patches, but they are small and easy to cross. Pace yourself and enjoy the views as you ascend. Yesterday the air was cool with a gentle breeze, so, luckily, heat or sweat didn't become an issue. Make sure to stay hydrated if you trek this steep section on a warm sunny day. Sunscreen and hat will be also handy.

Take in the jaw-dropping views from the top. Green Mountain is so GREEN! You have breathtaking sweeping vistas in all directions....N. Casacdes, Mt. Baker, Glacier Peak, and all other peaks near and far, and to the west is the Puget Sound! It was interesting to be able to see those local peaks along the Mountain Loop HWY side by side....Pilchuck, White Horse, Three Fingers, Pugh, Big Four, Dickerman and others. The outlook is closed, but you can enjoy views from the deck. It is amazing to see the old structure still standing proudly on top of the peak since 1933.

Green Mountain is one of the loveliest hikes I found in the N. Cascades. I am very glad I hiked when it is GREEN! Go soon if you want to see the "green" mountain in bursting wildflowers....and pick a clear day for spectacular views from the top. Happy hiking!


Saturday, July 2, 2016

Pinnacle Peak/The Castle - Mt. Rainier, WA


June 30, 2016

Two thumbs up! Amazing hike. In just a little over 1 mile/1000' gain, this hike offers sweeping vistas of breathtaking mountains, green valley, lakes, wildlife and the towering peaks of Tatoosh range - Pinnacle Peak, the Castle, Plummer Peak, Denman Peak, Unicorn Peak....and more beyond near and far....plus, great workout. You may say, "really?" And, my answer is YES!!

I always wondered if there was a way to hike up to those peaks sticking out on Tatoosh range seen from Paradise. To me, they always remind me of Gothic cathedrals visually. Last month when I hiked to Unicorn Peak, someone told me there is a short and easy trail to Pinnacle saddle. Since then, I put Pinnacle saddle on my hiking list. When I read the recent trip report on the hike describing the route is snow free and in good condition, my spirit said "let's go!"

Pinnacle Saddle
Trailhead is located right by Reflection Lakes across Stevens Canyon Road. Follow the trail sign which says Pinnacle Peak Trail. The trail starts with a gentle grade and soon climbs steadily. Snow along the trail is almost all gone and there are some small patches left here and there. Glacier lilies are abundantly blooming now in lower elevations and will be bursting all over pretty soon. The trail is in excellent condition, but partially a little wet, which is normal this time of the season as snow is still melting. There is a couple of long stretches of snow still standing en route in about between 0.5 - 1 mile from trailhead. But, they are not hard to cross as the snow is firm and not slippery, and boot tracks are solid. There are a few gullies to traverse en route, and they have some snow, but no problem to cross. One of the gullies has snow and scree (loose rocks) on the path and it was a little tricky as the scree created loose traction. So, pay attention as you proceed.

In 1.3 miles, you reach Pinnacle saddle....the portal to many amazing views and hikes! The trail sign says "End of maintained trail." Wow, where is the amazing views?" Mt. Rainier? Pinnacle Peak? Unfortunately, clouds were forming when I started the hike and by the time when I reached the saddle, it was totally shrouded in the clouds! Darn it....no views?...you've gotta be kidding!? I stepped over to the other side (south) of the saddle.... Mt. Adams was faintly visible through the clouds. But, wait....I could slightly see some blue skies to the east through the clouds!

Pinnacle Peak/the Castle
You have a couple of options for hiking from the saddle. Climbers routes run from the saddle....going right (west) for Plummer Peak and going left (east) for Pinnacle Peak and the Castle. Because I saw some blue skies to the east, I decided to take the trail to east and hike toward Pinnacle Peak/the Castle.

Bingo! The view gradually opened up in blue skies as I came out of the shroud of the clouds. Wow, amazing vistas before my eyes!....the Castle, Mt. Adams, Denman Peak, Plummer Peak, green meadow and valley (Butter Creek Research Natural Area) down below, wildflowers....and Pinnacle Peak looms right beside! In fact, the clouds shrouding part of the valley and surrounding peaks created a mystic beauty of austerity....adversity became advantage.

The climbers route to Pinnacle Peak/the Castle is not too bad. It's dirt, scree and rocks with a little up and down and over all in good shape. There are a couple of sketchy sections en route, but not hard to figure out the way. In about 1/3 mile from the saddle, you come to the point where you may need to decide....either ascend the scree slope to the ridge between Pinnacle and the Castle, or continue the trek toward the Castle, or turn around. It looks there are several different routes and options to choose from there, based on what you aim for with Pinnacle Peak and the Castle. Assessing my capability (I am NOT a rock climber or a hard core scrambler!) and visually evaluating visible traces of routes and other factors (grade, scree, rocks), I decided to climb straight up to a short ridge close to the west face of Pinnacle Peak, instead of hiking further toward the Castle. I was hoping for open vistas to north from the ridge. Ascending the steep route to the ridge was a little tricky due to loose scree, but manageable. A little scrambling near the ridge may be needed....I used my hands to grab the rocks. Overall, the route I took was secure and no serious climbing skills were necessary.

Take in the majestic view of Mt. Rainier! It's the best view of Rainier I've seen among all my Rainer hikes so far. The sea of clouds added a magical beauty no doubt. It gave me goose bumps all over. No joke! Pinnacle Peak looms right beside me and the Castle rises just to west from me. We juxtaposed all together there. Totally amazing. Beyond words. The view south was equally spectacular....Mt. Adams, Unicorn Peak, Denman Peak, Plummer Peak....and Mount St. Helens joined the skyline, too.

If you want amazing views for a short hike, I highly recommend the hike to Pinnacle saddle on a clear day. You can also explore part of climbers routes for additional adventures, either with Plummer Peak or Pinnacle Peak/the Castle. If you are a climber, you already know what you are looking for! I'd like to go back again to hike up to Plummer Peak next time.


Thursday, June 30, 2016

Marmot Pass/Buckhorn Mountain - Olympic Peninsula, WA


Absolutely FANTASTIC hike! Spectacular views of mountains, bursting wildflowers and mountain goats. Although the hiking distance and elevation gain may kick your butt - 5.3 miles/3,500 ft gain for Marmot Pass or 6.3 miles/4,500 ft gain for Marmot Pass and Buckhorn Mountain, it is totally worth the effort....the reward is jaw-dropping 360 views of Olympic mountains, Cascade range, Puget Sound (yes, you can see Seattle!), San Juans and beyond. I hear people make a special overnight trip to Marmot Pass for July 4th to view Seattle's fireworks.

Marmot Pass
The trail is in good condition and smooth sailing. There are some wet and muddy spots, but not a big deal. Blowdowns are cleared thanks to WTA's work. The first mile or so into the journey is a gentle grade and soon the trail begins to ascend steadily through the forest. It's a pleasant hike along Big Quilcene River and the sound of the stream is really soothing. At 2.6 miles you reach Shelter Rock Camp which is adjacent to the creek and it's a good place for a short break. I saw some Rhododendron on the way, but they are mostly done for the season now.

The trail continues to climb and the view opens up soon after Shelter Rock Camp and sky-scraping mountain peaks come into sight. Wildflowers are abundant along the trail from this point on. Look up to the gullies of Buckhorn and Iron Mountains for stunning views of the towering boulders.

At 4.6 miles, you pass Camp Mystery. Camp Mystery seems a very cozy camp site and tucked in by a creek nearby and a meadow along the trail. Marmot Pass is less than a mile from here, so chin up and keep going. The trail travels through a small meadow before ascending switchbacks which take you up to a vast open meadow. From the meadow Marmot Pass is seen on top of the saddle across the meadow. Follow the last stretch of the trail up to Marmot Pass as Buckhorn Mountain and wildflowers greet you.

Take in the gorgeous views from Marmot Pass....Olympic mountains, Buckhorn Mountain, Puget Sound and open meadow down below. There are small patches of snow here and there on the pass, but it's easy to cross. Although views from Marmot Pass are beautiful, if you want to get even better and jaw-dropping views of the Olympic range and Puget Sound with Cascade peaks, hike up to Buckhorn Mountain.

Buckhorn Mountain
The trail climbs steeply from Marmot Pass. It's about a mile to the summit. There are two steep sections en route....at the beginning and at the end where you ascend the summit block. The middle section of the route is a gentle grade on Buckhorn's saddle. The steep switchbacks at the beginning and at the summit block are dirt and scree and a little slippery, so be careful. I found hiking poles were helpful. The views get better and better as you ascend....Mt. Rainier and Mt. Baker show up in the skyline and the entire Puget Sound is visible. More peaks deep inside of the Olympic range show up, too. Wow!

There are two peaks on the summit block. Enjoy the jaw-dropping views sweeping all directions. Olympic mountains (I wish I knew all the names of the Olympic mountains!), Mt. Rainier, Mt. Baker, N. Cascades, Puget Sound, San Juans, and beyond. And, it was a special treat that I also saw a family of mountain goats. They were trekking along the trail on Buckhorn.

I am so glad that I did Marmot Pass/Buckhorn Mountain hike, and I do agree with other trip reports....put this hike on your must do hikes on the Olympic Peninsula! It's epically amazing. I highly recommend. Two thumbs up!!! :)

By the way, FR 27 (paved) has dips and bumpy spots here and there, and there are quite a few potholes on FR 2750 (unpaved). So, just pay attention as you proceed. Happy hiking!


Friday, June 24, 2016

Windy Ridge Trail, Truman Trail-Pumice Plains, Loowit Trail & Plains of Abraham Loop - Mount St. Helens, WA


Wow, wow, wow! Actually, I wowed a lot more in this hike. Amazing hike with stunning views of Mount St. Helens and Spirit Lake ...and bursting wildflowers. Mount St. Helens is visible even closer/bigger than seen from the observatory/Boundary Trail as this hike lets you experience trekking on Pumice Plain in the blast zone. Spirit lake is so blue with eerie remnants of the past with dead trees still floating. Mt. Adams looms big and beautiful just to east. Mt. Rainier, Mt. Hood and others peaks in the vicinity are also seen in this hike. This is very different from typical evergreen Cascade hikes; and yet, it offers its own unique beauty, geological terrain and dramatic history of mother nature since the 1980 eruption.

Ditch the crowd in the observatory! It seems the Johnston observatory and Boundary Trail are often crowded with visitors whereas Windy Ridge is much less so....and views en route from FR 99 are gorgeous. There are also quite a few off-shoot trails and vista points along FR 99. FR 99 (paved) is generally in good shape, but winding and bumpy at times, so pay attention.

Windy Ridge overlook....as the name speaks for itself, Windy Ridge was a little breezy, but not too bad. in fact, thanks to the breeze, the temperature was comfortable and no bug! I started my hike trekking up to Windy Ridge viewpoint upon the hill just behind the restroom. Take in the breathtaking pano view of Spirit Lake and Mount St. Helens. Mt. Rainier and Mt. Hood are also seen in clear skies. And, look east for Mt. Adams.

Windy Ridge Trail....the trailhead is located at the closed gate on the other side across the parking lot from the restroom. Windy Ridge Trail is a well-maintained wide dirt road which leads you to a trail junction for Abraham Trail and Windy Trail/Truman Trail in 1.75 miles. After a mile or so from the trailhead, the view opens up and Mt. Adams and Mount St. Helens come into sight....and wildflowers are blooming all over!

At the trail junction, you have a few options for hiking in Pumice Plain....follow Abraham Trail to hike up toward Plains of Abraham and loop around Windy Pass to Loowit Trail (or continue to Loowit Falls), or take Windy Trail/Loowit Trail to loop around Windy Pass via Abraham Trail counter-clockwise, or hike all the way to Loowit Falls via Windy Trail/Loowit Trail, or trek Truman Trail back and forth in Pumice Plain.

I deiced to explore Truman Trail first, and then Windy Trail/Loowit Trail, and in the end try Abraham Trail on the way back to Windy Ridge instead of doing Plains of Abraham - Windy Pass loop. Last month I hiked Boundary Trail from the observatory to Truman Trail, and this time I wanted to explore the east side of Truman Trail. Truman Trail traverses on the north side of Pumice Plain and eventually connects to Boundary Trail which leads to the observatory. I hiked about a 3/4 mile in and out on Truman Trail to see the north face of the lava dome. It is interesting to see sandy ash and pumice rocks/boulders along the trail. You can notice how nature and landscape have been reviving since the catastrophic eruption 36 years ago. Wildflowers are not abundant on the east side of Truman Trail, however.

Loowit Trail....back to the junction after Truman Trail, following Windy Trail to Loowit Trail was a little tricky at the beginning because the trail is partially washed out. Proceed to westerly from the trail sign, but not to south, to find the trail. Soon after crossing the dry creek, the trail appears obvious and easy to follow Windy Trail to Loowit Trail. The trail goes up and down on Pumice Plain. There is a narrow stream crossing and in 3/4 mile you come to Loowit Trail. I trekked another 1/4 mile or so toward Loowit Falls before I turned around. Enjoy Pumice Plain trekking up and down with wildflowers decorating along the trail and the view of the lave dome. (it's huge!) Spirit Lake is also seen down below to south and spectacular. Mt. Adams also greets in the eastern skyline behind Abraham Trail ridge line.

Back to the trail junction again from Loowit Trail, I took a short journey up to Abraham Trail to explore part of Plains of Abraham loop trail. The trail runs along a long ridge (south end of Windy Ridge) and climbs steep at first, but no worries....it's short. There are log steps connected by wire rope installed on the steep grade. I also noticed traces of bike track along Abraham Trail which indicated the trail is shared with mountain bike riders. Then, I realized the log steps with wire rope are designed for both hikers and mountain bikes. I didn't see any bike riders, however. (Perhaps, it was not weekend?) The vistas from all along the ridge are stunning left and right....Mount St. Helens/Pumice Plain, Mt. Adams, Mt. Hood and the valley down below to east, plus bursting wildflowers. I didn't hike all the way down to Windy Pass as I ran out of time, but the hike along the ridge was great enough for the fantastic views and good workout!

This was my first time to hike the northeast side of Mount St. Helens and now it has become one of my favorite hikes. Although it's a long drive from Seattle (well over 3 hrs!), this hike is certainly worth the trip for what you experience. Go soon for wildflowers as they are in full swing now. Make sure to bring sunscreen, sunglasses, hat and enough water for this hike as it could get pretty hot and dry under sunny skies in summer!


Monday, June 6, 2016

Unicorn Peak via Bench and Snow Lake Trails - Mt. Rainier, WA


This is an epic hike "if" it's done timely....before the snow melts away and the route to Unicorn Peak becomes rocky.

I snow-hiked Bench and Snow Lakes Trails 3 weeks ago and noticed a pointy peak looming by Snow Lake. It intrigued me and learned the peak was Unicorn Peak. Seeing boot tracks heading up to the gully toward the mountain peak, I figured that must be the way to Unicorn Peak.

Reading the recent trip report and WTA's description, I decided to try Unicorn Peak and set the goal to reach the saddle below the summit block. I am an avid hiker, but not a rock climber or into a hard-core scrambling, so reaching the saddle and get a closer view of the peak would be a great adventure, I thought. And, the mission accomplished! What an exciting journey it was! I am glad I did this hike while the route is still snow covered (instead of rocky) and the weather was gorgeous with no bugs this weekend.

The trail to Bench and Snow Lakes is mostly snow free...just patchy snow here and there. The trail has some muddy spots, but no biggie. Glacier lilies are popping out now and will be blooming more soon.

There is one blow down blocking the trail, but it's easy to get around. There is a creek you have to cross, which seemed posing a little issue. I saw some hikers needing a help to cross the creek. There were three options I found for crossing the creek yesterday....hopping on rocks (staying on trail), big fallen tree (veer to left from trail) or small wood piece (veer to right from trail). You can follow the boot tracks based on which way you want to choose for the creek crossing. I followed the boot tracks going right from the main path and found the small wood setting over the creek. The creek seemed relatively shallow there and not too wide (about 4 feet). See the pics for comparison.

After the creek crossing, the trail becomes mostly snow covered and leads you to Snow Lake. The lake is not completely snow/ice free yet, but it is showing up more compared to 3 weeks ago (it was still mostly frozen).

From the lake, I continued the journey to ascend the gully by following the boot tracks. I passed by quite a few climbers coming down en route. The gully is very steep. I could manage ascending the first half without traction device, but as it got steeper and the snow was slushy and slippery, I decided to use microspikes for ascending the second half. Hiking poles are a must. Ice axe may be even better in case of losing traction and slipping down the gully.

The view of the snowfield at the top of the gully is spectacular. It's surrounded by the mountain wall....it made me feel like hiking into a snow-filled gigantic stadium. As you continue to ascend, turn around once in a while and enjoy the view of Mt. Rainer behind you. Traversing the snow field, Unicorn Peak comes into sight with another pointy peak (West Unicorn Peak). My destination was to reach the saddle between the two peaks. The slope to the saddle is once again very steep....and it was slushy/slippery in the late afternoon. I even wished for crampons!

Take in the grand view at the saddle! Worth the effort!! With Unicorn Peak next to you, Mt. Rainier to north and Mt. Adams, Mount St. Helens, Mt. Hood and other peaks of Tatoosh range to south are seen. I hiked down to the south side of the saddle to get a better view of the southern peaks. From the saddle, the climbing routes to the Unicorn's summit block are - scramble the steep north west face, or ascend the snow covered steep route along the south side of the peak, or traverse below the saddle to the east side for scrambling. You should be better equipped with ice axe, crampons and helmet to reach the summit block safely. 


Descending from the saddle was a little tricky due to the steep grade and slushy/slippery snow condition which presented a poor traction. So, I ended up glissading down part of the way which saved also my knees! Trekking down the gully was fair as the snow was not so slushy/slippery and I could use the boot tracks as a step.  

Unicorn Peak was a great hike and adventure with fantastic views, though it was a bit strenuous to conquer the two rather steep slopes. Instead of scrambling up the rocky trail/gully after the snow is gone, I am glad that I did this hike with the trail still snow covered. The journey to Unicorn Peak gave me such an exciting hike similar to Camp Muir, but only in a shorter distance! (5 miles RT) Two thumbs up!


Whiskey Dick Wildlife Area - Wild Horse Wind & Solar Facility, WA


This hike was one of my bucket list for quite a while since I noticed the wind turbines along I-90 near Ellensburg. I am glad I finally made it.

There are four trails you can explore in the area depending on your interest....Ridgeline Solar Trail (2.4 miles RT), Bitterroot Trail (1 mile RT), Bluebird Canyon Trail (1.7 miles RT) and Whiskey Dick Mountain Backcountry Routes (8 miles? RT).

I started my hike at the Renewal Energy visitor center located in 3 miles up on Beacon Ridge Road from Vantage Highway. As part of the hike, I highly recommend to stop by the Renewable Energy Center because you can get basic info on the hiking trails, permit and also learn about a unique renewable energy complex of the wind and the sun. The staff at the center is very helpful and I learned so much about the wind turbines and renewable energy. There is a restroom, too (nice and clean!). You don't need a hiking permit to hike Ridgeline Solar Trail, Bitterroot Trail, Bluebird Canyon Trail, but to hike Whiskey Dick Mountain Backcountry Trail, an Access Permit is required at the center.

Those turbines are gigantic!...360ft tall and blades are 240ft diameter made of fiberglass. It costs $3 million to build one turbine which generates power enough for 40 households annually. Lifespan of turbine is about 20 - 30 years. It takes about 15 years for return of investment and after that will be profit minus operating costs. The complex can generate electricity for 70,000 households per year. The turbine has a wind sensor to sense wind directions for efficiency and newer turbine designs can generate 4 times more energy than the current ones which were built over 10 years ago. About 10% of Puget Sound Energy is generated by the wind. I learned something new - wind turbines and renewable energy.

The trails are well maintained and good condition, and you encounter no significant elevation gains (a gentle few hundred feet) with Ridgeline Solar Trail, Bitterroot Trail and Bluebird Canyon Trail. There are trail signs, but they are very small....a small plate attached on a small rock on the ground! So, the map I got at the visitor center was helpful to navigate. I didn't hike Whiskey Dick Mountain Backcountry Trail in this trip, but I was told parts of the trail get faint and sketchy, so carrying a map seems a good idea if you are hiking Whiskey Dick Mountain Backcountry Trail.

It was quite interesting to hike along those wind turbines on the mountain hills. From the top of Ridgeline Solar Trail, you can view the entire wind facility with Mt. Rainier and Mt Stuart range in the distance. I was hoping to see some wildlife, but no luck yesterday....deer and elk can be sighted. Wildflowers are still out there and blooming. There were about 5 - 10 mile winds yesterday, which helped not sweating too much and also kept bugs away, I think. By the way, this is a desert hike, so be prepared for hot, dry and sun-exposed conditions when you do this hike.