Hiking and climbing mountains inspired me into this life philosophy - LIFE IS A MOUNTAIN. Every step you make leads to summit. You may be forced to turn around or change routes for any cause, never know. But, stay focused and look forward. The mountain will be there always. Pace yourself and reach "your" summit, for every step counts. Enjoy the view and feed your soul as it comes along. Life is a journey, not a destination. Life is like climbing a mountain.....
Ditch the crowd in Paradise! The hike to Pinnacle Saddle and Plummer
Peak is an easy short hike with moderately steep trail, and views are
FANTASTIC....and less crowded! Perhaps, one of the best and
breathtaking views of Mt. Rainier you can get with less effort.
To
get to Plummer Peak, go right/to the west from Pinnacle Saddle. If you
go left/to the east, that's climbers route for Pinnacle Peak and the
Castle. Soon after you trek down the trail from Pinnacle Saddle towards
Plummer Peak, from the main trail there is a sandy trail going uphill
to your right. Take that sandy trail to hike up the slope which leads
you to the route to Plummer along the saddle. You can actually see it
along the saddle if you look up toward Plummer when you approach
Pinnacle Saddle.
The trail runs along the saddle and sits on a
steep gully, but it is in good shape and solid. So, just traverse
carefully. Mt. Rainier to your right and Pinnacle Peak behind
you....wow, what a view! The trail gets a little rocky part of the way,
but fairly easy hike. In a little over 1/2 mile(?) from the saddle,
you reach the top of Plummer Peak. Easy scrambling is needed to get to
the summit rock.
Wow, sweeping panoramic views in all
directions!....Mt. Rainier, Pinnacle Peak, the Castle, Unicorn Peak,
Goat Rocks, Mt. Adams, Mount St. Helens and more peaks and ranges far
and near. I could see lots of cars in Paradise....crowded!
If
you want amazing views from Tatoosh range, I highly recommend Plummer
Peak. Perhaps, you can combine with other hikes for a day hike as it's a
easy and short hike. By the way, I noticed colors are
changing....summer is almost over! Get out there and enjoy every bit of
the summer hiking before it's gone! Cheers!!
This is a great hike with jaw dropping views of N. Cascades including
Mt. Baker, Glacier Peak and Mt. Rainier. If you like the hike of Cascade
Pass/Sahale Arm, this hike will not fail you with sweeping vistas of
amazing landscape and mountain ranges. However, no pain, no gain....be
prepared for a strenuous journey as the trail continuously climbs up and
up, and even gets rocky. Wildflowers are still blooming strong,
particularly paintbrush is abundant at this point. But, summer is
fading....so that could change any time soon.
The lookout is
going through re-roofing now and the work may continue for a week. I
saw two guys (Robert and Ethan) working on the roof. Many thanks for
their work and dedication!....I should have brought them a bottle of
sake for kampai (cheeres)! It made me realize once again the fact that
it does take time and effort to preserve history and wilderness. Hike
up there and witness the history and appreciate their work while
re-roofing is in progress or completed.
Road condition
Cascade
River Road is paved and in great condition. Drive about 10 miles to the
junction/FS 1540. There is a sign for the Hidden Lake Trail. FS1540 is
a narrow dirt road (rutted, rocky, pot holes). So, go slow and take it
easy. My sedan could handle the road with no problem. In 4.5 miles you
reach trailhead. There is one section on the road where it gets really
narrow due to washout, but the spot is well marked with a white stick,
so pay attention as you go....you don't want to drive off the edge!
Trailhead
Parking
lot is small. When you park in the lot or on the road, make sure to
leave enough room for other cars to drive in/out. No privy at
trailhead.
Hidden Lake
The journey begins in the forest and
the trail climbs steadily. In about one mile, views open up as the
treeline thins out and you come to green meadows on the hillside in the
valley. Wow, wildflowers galore! The higher you go, the more flowers
blooming....particularly, paintbrush. The trail continues to climb
steadily with switchbacks for another 1.5 miles or so. As you reach the
saddle, look for Mt. Baker looming over the skyline. The trail levels
out along the saddle. After the breather for 1/2 mile, the trail climbs
up again and gets rocky. The views get better and better as elevation
gains, however. Trekking up the steep and rocky trail about 1.5 miles,
you reach the bottom of the summit block of Hidden Lake Lookout. From
there, zoom in and look for the lookout sitting on a granite boulder
pile at 6,900 feet. What a view! The trail continues to the ridge
where Hidden Lake can be seen down below. There are some snow fields to
traverse about 200 feet or so....it's slushy, but easy to cross. Enjoy
the view of Hidden Lake!....with Forbidden Peak/Boston Peak/Sahale
Arm/Johannesburg in background. Cascade Pass (another amazing hike!) is
somewhere behind Johannesburg, you can visualize.
Lookout
The
trail continues from the viewpoint of Hidden Lake. To reach the
lookout, follow the steep trail climbing up with switchbacks to the
summit. It's pretty steep ascent, but the route is solid with
switchbacks....hopefully, you are not acrophobia!? A little scrambling
and rock hopping are needed for the final push to the lookout.
Wow!
Take in the sweeping vistas in all directions! Splendid! 360 panorama
of jagged N. Cascades peaks with Hidden Lake as foreground, including
Eldorado, Forbidden, Boston Peak, Sahale Mountain, Johannesburg, Spider
Mountain, Mt. Formidable, Snowking Mountain and more. Glacier Peak, Mt.
Baker, and Mt. Rainier are seen in the distance. When you stand on one
of the pointy granite rocks and view those craggy peaks far and near, it
almost makes you feel like you are standing on the Himalayas. It was
also nice to happen to witness the work of re-roofing the lookout. Can
you imagine what it would be like roofing the lookout standing on top of
the granite boulder pile at 6,900 feet?
This hike is
definitely one of the top 10 hikes among my favorites now....not only
spectacular views, landscape, wildflowers and lookout, but also the hike
gives you a sense of the experience of being out in a remote alpine
wilderness. With extra sweat and effort, the reward you'll see is
AWESOME! This is a hike that should be on your hiking list as a PNW
hiker!!
Taft Point Taft Point offers one of the most breathtaking (and it might really take your breath away for its sheer drop!) views of Yosemite Valley. And it's only a little over 1 mile without much elevation gain to get there.
Driving for Glacier Point on Glacier Point Road, just before arriving Glacier Point, there is a parking lot for the Taft Point/Sentinel Dome
The hike is easy for family and kids as well. Just hiking a little over a mile, you can get to see jaw-dropping vistas of the Yosemite Valley with El Capitan and other well-known granite statues of Yosemite. DO NOT stand close to the edge along Taft Point. It's sheer drop! If you are with little children, make sure to keep them stay with you and away from the edge. If you are acrophobia, don't look down.
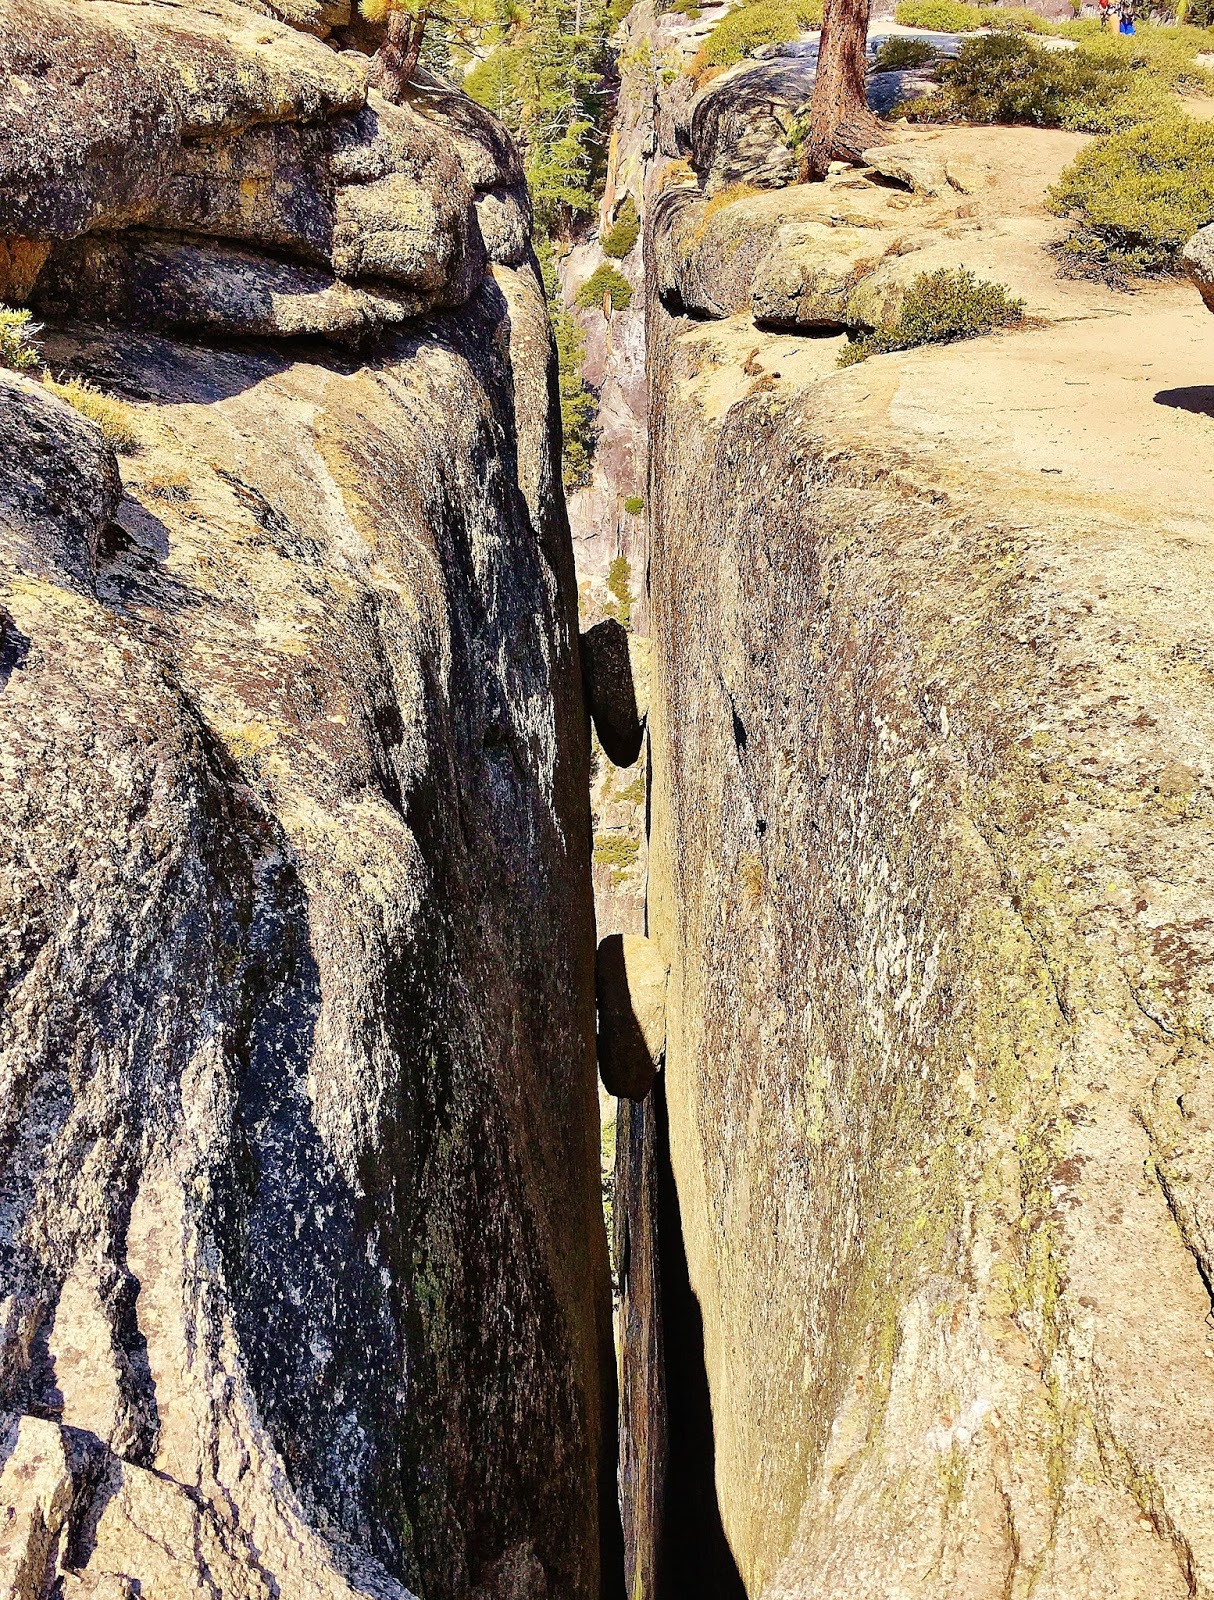
The hike also shows amazing formations of the fissures which visually illustrate the Yosemite Valley's geological formation before your eye. Like Glacier Point, Taft Point can be also best experienced at sunset, overlooking the beauty of El Capitan and the Yosemite Valley.
Sentinel Dome
Sentinel Dome is, perhaps, one of the Yosemite's easiest hikes to experience spectacular panoramic views of the Yosemite Valley in all directions and beyond including peaks of High Sierras and Sierra Crest. When the skies are clear, you can see:
To the west....Yosemite Valley and all the way to the Merced River canyon. To the north....Yosemite Valley with El Capitan, Eagle Peak and Yosemite Falls. To the east....Nevada Fall, Half Dome, North Dome, Clouds Rest, Mt. Watkins and more. To the south....Horse Ridge/Buena Vista Crest in Yosemite Wilderness.
Famous Jeffrey Pine on Sentinel Dome
The dead tree on Sentinel Dome is the Jeffrey pine that became world famous for the 1940 Ansel Adams photo. The tree was killed by drought in 1977 and fell over in 2003. And yet, it still exists there as its legacy continues.
The hike to Sentinel Dome is easy and pleasant like Taft Point although it gets a little rocky part of the way and climbs the moderately steep face of the dome to the top for a short distance.
For an option to combine hiking Taft Point and Sentinel Dome, you can hike along a loop trail connecting Taft Point and Sentinel Dome instead of making back and forth hikes to the trailhead to do both hikes. The loop trail travels facing to the Yosemite Valley off and on with stunning views of the Yosemite Valley....and the trail is less crowded and quieter if you prefer. You can also hike to Glacier Point from Sentinel Dome in 1.6 miles.
Trailhead - Pyramid Creek/Twin Bridges on US 50 5 miles (?) RT 800+ (?) Elevation gain
This is a very popular hike along HWY 50 on the way to South Lake Tahoe. It is a short hike, but the trail climbs steeply toward the magnificent Horsetail Falls. The trail may get a bit sketchy where you traverse those giant granite slabs, but generally easy to follow along the trail. There are many short trails branching out to the creek from the main trail, so don't get confused or lost. Most hikers end their journey at the bottom of the falls unless you are confident enough
to scramble the steep rock slabs to the top of the falls. If you are to tackle the way up to the top, use caution as those granite slabs can be very slippery because of the splashing water from the falls. Also, route finding skills are a must as there is no well established route to reach all the way to the top.
As informed by the rangers at the trailhead, the route I was advised to take to the top of the falls was climbing to the left from the big granite slab where you come to choose either go to the right or to the left. Going to the right can be very slippery. Scrambling up to the left eventually leads you to a partially established trail through screes/talus rocks and boulders and in time and effort gets you to the top. Some scrambling necessary, however. There are cairns along the route which also help and guide you on the way up to the top and on the way to come down.
Enjoy the views of the Horsetail falls from above! Magnificent and powerful falls. You can trek around Avalanche Lake to explore the alpine wilderness. If you are backpacking, Avalanche Lake will be a perfect site for overnight, or you can continue to hike farther deep into Desolation Wilderness if you are an experienced backpacker.
This is a long day hike/15 miles RT from Echo Lake passing 5 alpine lakes to reach Lake Aloha - a prime swimming spot of beautiful Desolation Wilderness. The hike to Lake Aloha is a must do hike in Desolation
Wilderness to experience what Desolation Wilderness offers....alpine lakes, wildflowers, wildlife, alpine peaks and a remote sense of wilderness.
The trail is mostly flat through the hike with some sections of elevation gain, and also gets rocky part of the way. You will pass by 5 lakes
in this hike. Enjoy the views of the alpine lakes....and swimming if you like! I saw hikers sunbathing, napping and of course, swimming in the lake(s)....there is no
better way to relax than swimming after a long hike in a hot summer day! Lake Aloha is gorgeous with pristine water surrounded by alpine boulders and picturesque peaks. It's a great place for camping and backpacking so that you can explore the area more leisurely.
For a side trip, I recommend to stop by Lake of the Woods located near Lake Aloha. You can hike there on the way to/from Lake Aloha as the trail sign directs.
This is a great hike to experience Desolation Wilderness with spectacular views. Maggies Peaks are one of the gateways to Desolation Wilderness. There is no official trail going up to Maggies Peaks from the main trail/Bayview Trail, but you can follow boot tracks to the peaks once you reach the saddle and aim to climb towards the top. Keep "minimum impact" in mind, however, and not to trek over and damage vegetation. Maggies south peak offers a fantastic panoramic view of Lake Tahoe, Emerald Bay, Cascade Lake, Fallen Leaf Lake and South Lake Tahoe with surrounding Tahoe rim and Carson range peaks - Mt. Tallac, Freel Peak, Jobs Peaks, Mt. Rose and more. From Maggies north peak, you can peek into the remote alpine environment of Desolation Wilderness.
I continued the journey to Dicks Lake from Maggies Peaks via Bayview Trail and took the same route back to the trailhead. You can take side trip options for Velma Lake and/or Eagle Lake en route to/from Dicks Lake, which will add extra distance and time to the journey.